Father's Day is fast approaching.....June 19th for those who need a reminder. This folded shirt card was a huge hit last year, so I thought that I would share it again with you.
I am a Daddy's girl and proud of it!! The trouble is that I always want to do something special, but my Dad is tough. He hates ties, he doesn't have any hobbies--no golf, fishing, or tools--and the only thing he collects is Dallas Cowboy memorabilia. After 53 years, I think he has everything ever made with a Dallas Cowboy star on it.
I am a Daddy's girl and proud of it!! The trouble is that I always want to do something special, but my Dad is tough. He hates ties, he doesn't have any hobbies--no golf, fishing, or tools--and the only thing he collects is Dallas Cowboy memorabilia. After 53 years, I think he has everything ever made with a Dallas Cowboy star on it.
So, I relied on my fellow bloggers for inspiration and saw the cutest card ever on Talk Crafty To Me. This was perfect for my Dad. He loves clothes and I can always remember that Dad had to have a shirt with a pocket on the left side for his cigarettes and pens. It was a really big deal. So, while in stash busting mode, here is my Dad's Father's Day Card.
See the little pocket? If your Dad is a tie-wearer, then it would be super cute with a little tie as well.
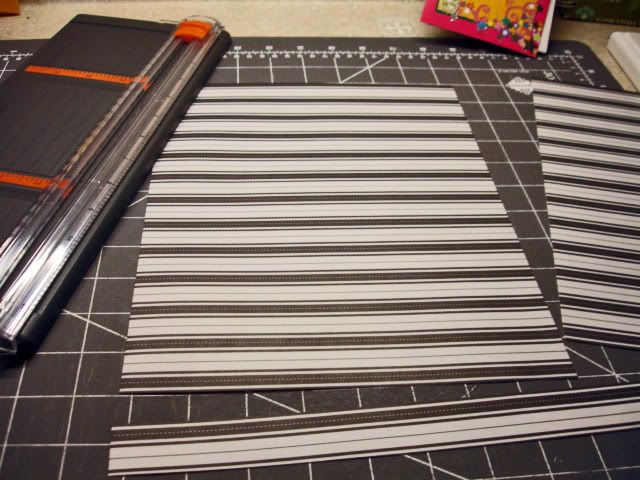
Here's how I made it. I started with a 12 x 12 sheet of scrapbook paper that I had in my stash. And cut it to 8 1/2 x 11.
Hint: Small prints work best!
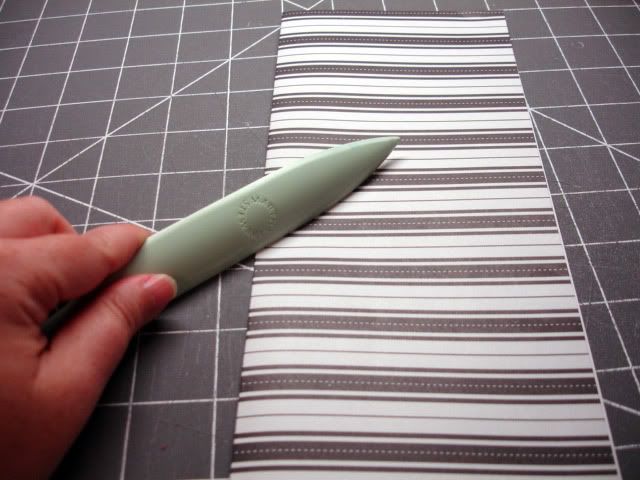
Next, fold your trimmed paper in half and crease it well. A bone folder works magic with this project!
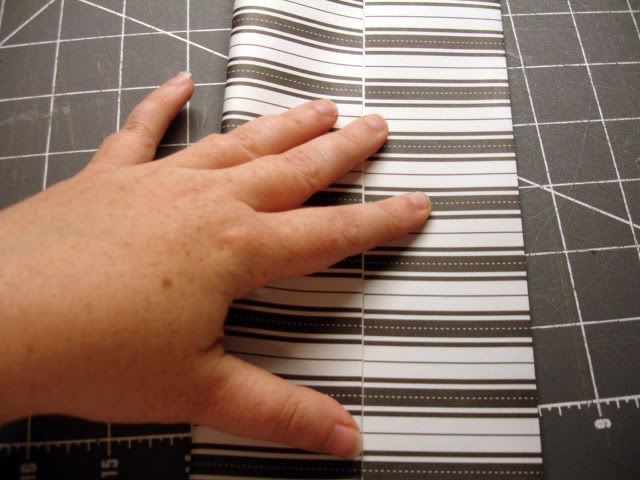
This will become your first valley fold. Create two more by bringing in the sides to your center fold. Be careful not to overlap the center fold line. It's ok to have a little paper showing between your sides. This will keep your card from having too many layers.
Don't forget to use your bone folder or ruler to really crease your folds well. Next, open up your paper and bring your right and left corners up to the outside valley folds.
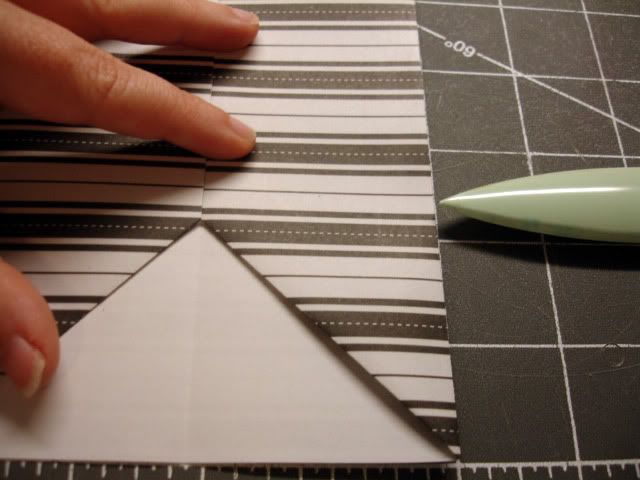
Fold the sides back in, and then fold the bottom up just past the point on the triangle. For those of you who like to measure, that's about 2 1/4 inches.
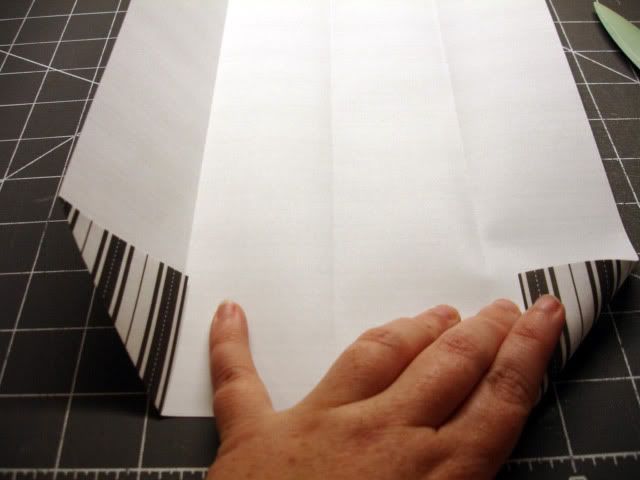
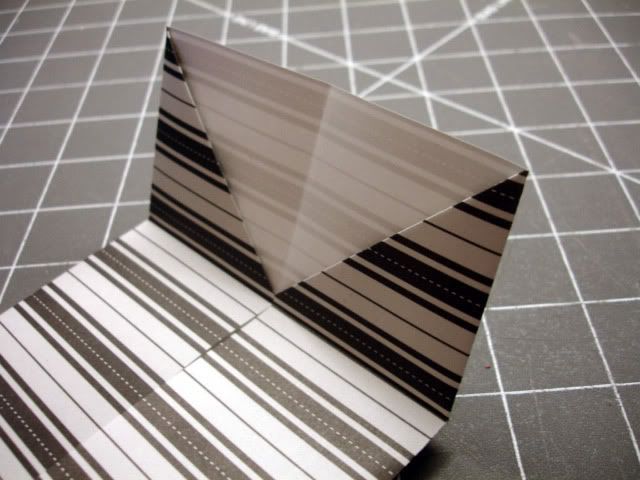
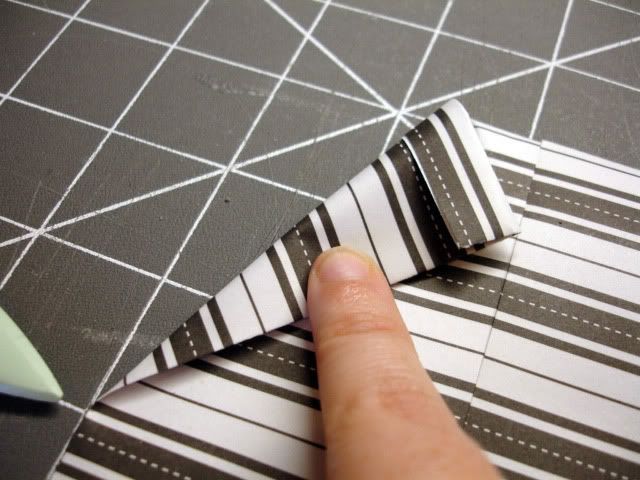
I hope you are still with me because now comes the tricky part. Grab the point at the top of the triangle on each side of the center fold and bring it up and over to the outside fold. The bottom flap will come up a little. Don't fight it. It will actually help you get a better fold. Be sure to use your bone folder to crease the inside folds well.
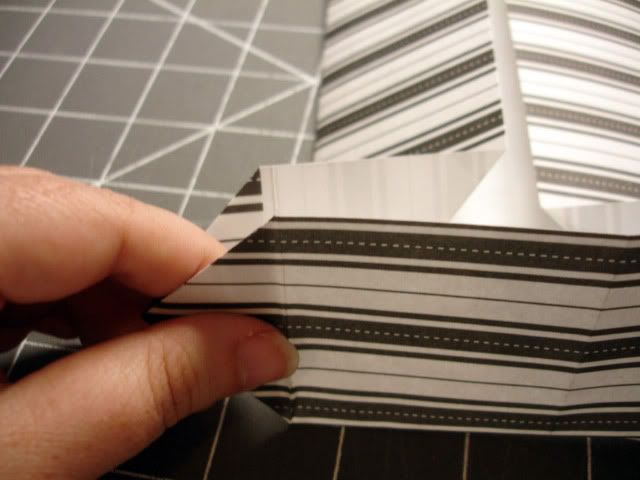
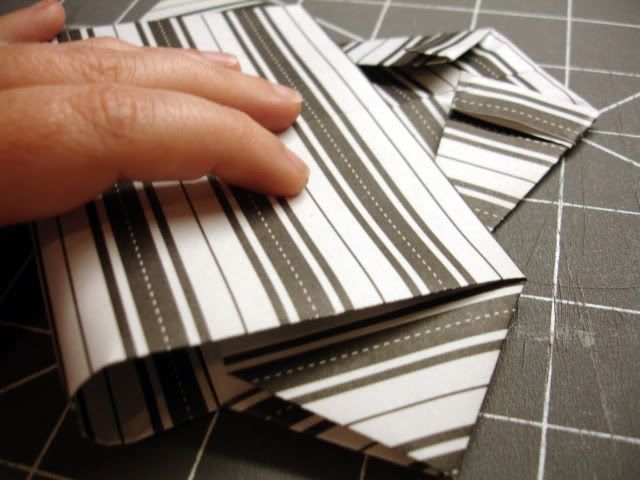
While you are here, pinch the side flaps and fold the bottom flat. A little something like this:
You've just made the shirt sleeves! Cool, right? I know. It's a lot of work, but it's totally worth it in the end. You've made it this far, so let's keep going!
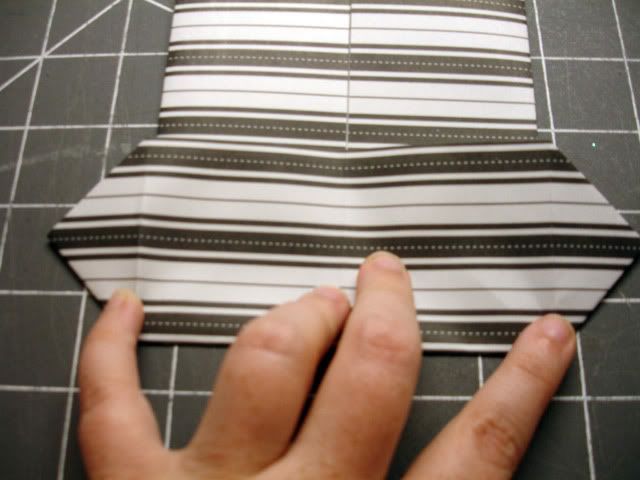
Let's move up to the top. Flip the paper over and fold the top down about a 1/2 inch.
Flip your paper back over and fold the top corners at an angle in to the center fold. You'll fold about three inches down the paper. This makes the collar.
One last step, then it's time to embellish. Fold the bottom up and tuck under your collar. Use your bone folder to press all of the folds and voila!
Now, raid your stash for buttons (I used brads), tags, ties or pockets. Embellish the inside of your card with a party invitation, a sweet note, or a gift card.
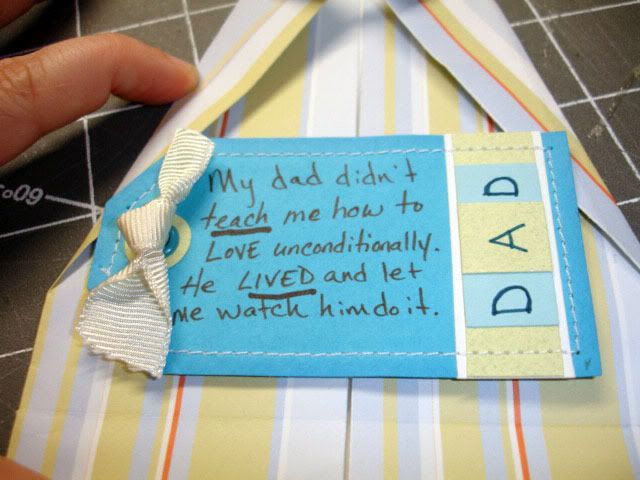
Here's the inside of my Dad's card. The tag reads: "My Dad didn't teach me how to love unconditionally. He lived and let me watch him do it."
I hope you stuck with this. As a "suppa-prize", as my sweet nephew calls it, go here to see a how-to video of the steps above and additional ideas on what to do with this unique little card.
LoVe YoU, DAD!
I'm linking to these parties:


 >
>










I popped over after your sweet comment on my blog, but it looks like I'll have to come back from home as my office filters are blocking all of your photos! But you're bookmarked.
ReplyDeleteThank you for your nice comment on my washer necklace/story blog post. I like the folded shirt card you've done, it could be done in paper to look like a Hawaiian shirt for an invitation or even a team shirt for a sports fan. It's cute and clever, just like you.
ReplyDeleteThat is so neat to have such a personalized card for your Daddy! Kudos to you! Stopping over from the blog party. :)
ReplyDeleteThose are fabulous! Love the quote inside the 2nd one.
ReplyDeleteI'd love if you linked this up to my Scrappy Saturdays: http://www.scrappy-gifts.com/2010/06/18th-scrappy-saturdays.html
Super cute! I made a similar one a year or two ago.
ReplyDeleteThanks for linking up to the Mad Skills party!
ReplyDeletemadincrafts.blogspot.com
Super cute!
ReplyDeleteThanks for linking up!
~Liz
Thank you so much for stopping by Jenn. I love love LOVE these cards, I'm thinking I can definitely use these as an excuse to make a card for my dad's birthday! Take care ~Sam
ReplyDelete